As this blog is for informational purposes, I assume no responsibility for the operator.
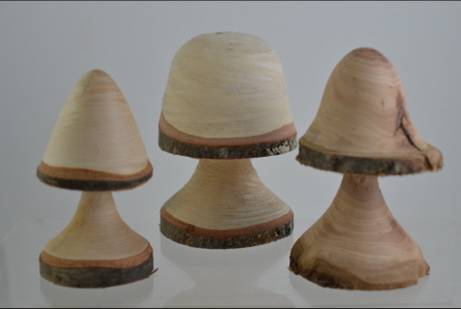
I hope to encourage you to turn mushrooms if for no other purpose than to practice tool control. As there are many sizes and shapes of mushrooms there is no ‘perfect’ mushroom except for the one that you make! The typical size I have found to be most appealing is approximately 2 inches (≈5 cm) in diameter or smaller. Mushrooms can be turned using green (wet) or dry wood. If using green wood then there is a tendency for the mushroom to develop a crack or two once it has dried. The advantage of turning green wood is that the bark typically remains attached.
For this exercise in spindle turning you will need a lathe, of course, along with a four jaw chuck, a spindle gouge and a parting tool. A live center in the tail stock will be of great assistance during the roughing out stage. While ‘normal’ sized gouges and parting tools can be used, a pen making set is easier to maneuver on small projects like this. For your wood a tree branch of approximately 2 inches (5 cm) in diameter and about 5 inches (≈13 cm) in length can be used. I have a lot of crab apple trees in my yard that I save the trimmings for projects like this.
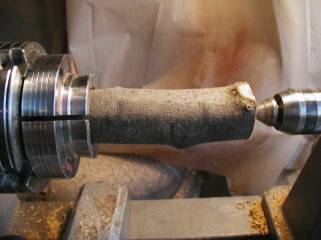
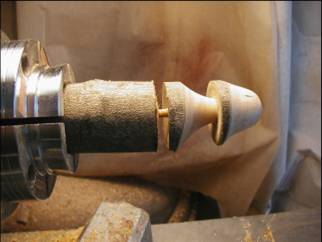
The wood is mounted in the four jaw chuck and a live center is brought up to support the wood blank. My typical lathe speed is approximately 1200 RPM but you can use a slower speed if that is more comfortable for you. Before turning ON the lathe, make sure the tool rest does not interfere with the rotation of the wood by rotating the wood by hand. With the tool rest slightly below the center of the wood you are ready to make some shavings.
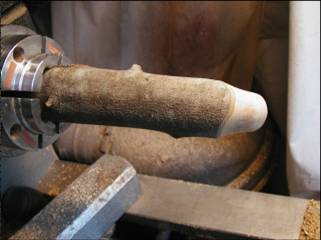
The safest way to make a mushroom is with the cap of the mushroom towards the tailstock. I typically figure the height of the cap of the mushroom to be about the diameter of the wood or slightly smaller. There is no special formula to figuring the shape or size as when the piece is finished you can always say it is the size and shape you planned. Using the spindle gouge, slowly work on roughing out the shape of the mushroom top using caution to not strike the live center. Occasionally stop the lathe if using green wood and ensure the chuck is tight. When the upper portion of the mushroom is turned to close to your liking you can back off the tailstock and using light cuts to finish mushroom cap. I like to leave a narrow strip of bark at the bottom of the cap as a natural edge. I typically figure on a lip of approximately ¼ inch (0.6 cm), and use the parting tool to give a sharp clean edge to the bottom of the cap. With the parting tool slightly undercut the cap.
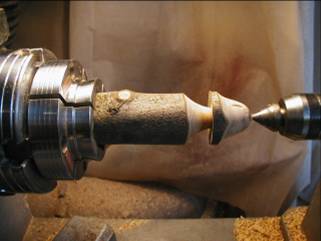
The spindle gouge is then used to shape the stem. I typically make the stem about the height of the cap. Once the stem is turned then your object of art needs to be cut off of the lathe. This is accomplished by using the parting tool. I typically leave a strip of bark about the same width as I left at the bottom of the mushroom cap. A parting tool is used to cut the mushroom off of the lathe by undercutting the bottom edge of the base slightly. By making a slight undercut it will allow the mushroom to sit on a flat surface without rocking.
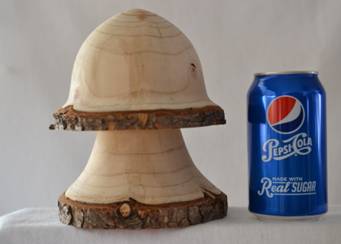
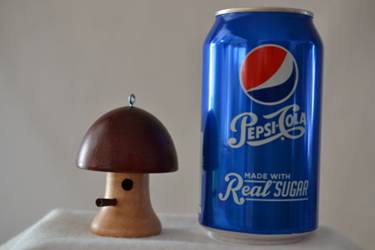
If you want to think out of the box there are many other versions of a mushroom that can be turned on a lathe. The largest mushroom I have turned was approximately 7 inches (≈18 cm) in diameter and mushrooms of this size can potentially be used as a door stop. Another version of mushrooms can be a mushroom styled miniature bird house. The pictures below are shown with a soda can to show their relative size.
My next blog will be lathe maintenance.
